There is something about a neatly tied bundle of herbs, hanging up to dry, that transports us to another era. A simpler time where herbs could be found hanging in every cook’s quarter and apothecary.A time in which Mr. Darcy invited us to tea and a leisurely stroll around the gardens of Pemberley (if you are unfamiliar with this reference let me introduce you to one of the greatest books of all time). I digress… Aside from the unpractical, there are two reasons I love drying my own herbs: it is cheaper and I can control the quality. Let me elaborate.
Drying herbs yourself is much cheaper than buying a bottle of herbs in the store, especially if you buy organic. It doesn’t take much more time and effort than a trip to the store either. If you grow perennial herbs, you have a one time expense, and then you have a supply of fresh herbs year after year. My thyme plant, for example, comes back strong every year and produces more than enough to fill my cooking needs.

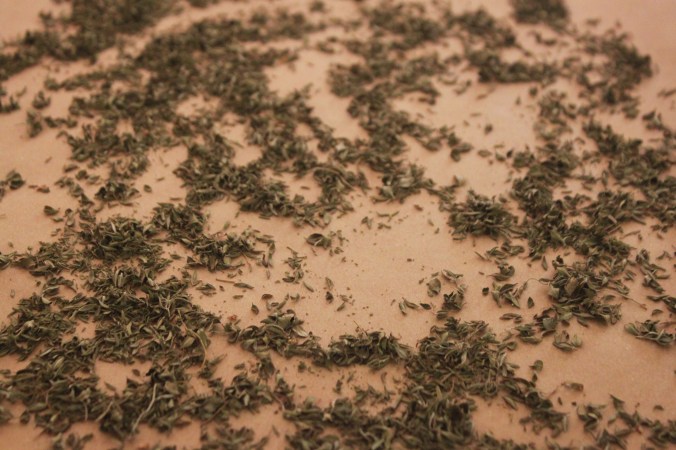
When you buy herbs at the grocery store, you don’t have control over their quality. I’d like to assume that the herbs I buy are good quality, but there can be a few problems with the typical grocery store bottled herbs. First, many dried herbs are not organic, which means that they’ve been sprayed with toxic pesticides. Of course, some herbs are organic, but they’re also quite a bit more expensive and usually have less variety than non-organic herbs. Second, many of the dried herbs have been irradiated, which means that they have been exposed to gamma radiation to destroy any possible microbes or pathogens along with a good portion of the vitamin and nutrient content. Third, sometimes store-bought herbs have a lot of extra twig fragments mixed in with the dried leaves. It’s not a major issue, but if I’m going to pay the premium price for organic oregano, I want to get oregano leaves and not oregano twig fragments. You end up with much better quality when it’s just you sitting at the kitchen table stripping the leaves off the stems and putting them in a bottle.
Feeling enthused to dry your own herbs? Great – let’s get started!
Getting Started

As I’ve learned over the years, timing is everything when harvesting your herbs. Harvest herbs in the mid-morning after the dew has dried from the leaves and before the essential oils have been burned off by the sun. Try to harvest herbs before flowers develop for better flavor. I have dried both with and without flowers, and it does tend to make a difference.
Washing herbs usually isn’t necessary if they are grown organically. Discard any dead, damaged, or wilted leaves.
Drying Methods

When herbs are dried, they are safe from bacteria, mold, and yeast. Effective drying relies more on abundant dry, fresh air than on heat. A well-ventilated place is ideal. If you live in a humid area, the process may be slower, and mold can be a problem. If mold is an issue, I recommend using an indoor drying method instead.
Hanging Dry
For thousands of centuries cooks and apothecaries have dried herbs using this method and it is still one the easiest (and most fun) ways to dry herbs today. Your herbs can be hung virtually anywhere outdoors that has good air circulation. Most recently, I dried herbs by hanging them from my fence, garden gate, and off the end of an old rake head.


Instructions
- Tie sprigs or branches into small bunches. Large, dense bunches can develop mold and discolored leaves.
- Hang the bunches up to dry, leaves downward. If you live in an area with lots of dust, cover your herbs loosely with muslin or a thin paper bag.

3. Allow seven to ten days to dry, depending on the size of the branches and humidity. The herbs are completely dry when the leaves are crisp and crumble when crushed.
Rack Dehydrator Drying
Say hello to my little friend, the commercial dehydrator. This beauty has served me well during many harvest seasons and is by far my favorite way to dry herbs indoors.

Instructions
- Remove large herb leaves (such as sage, basil, and mint) and place in the dehydrator. Herbs with small leaves (such as thyme, rosemary, and oregano) can remain on their stems during the dehydration process.
- When placing herbs on trays, leave space between them to provide ample air circulation. Keep track of which herbs you have placed on each tray. Once they are dried, it’s more difficult to distinguish between them.
- Drying times depend on the water content in the herb. Check often for dryness so they do not remain in the dehydrator longer than necessary. Trays should be checked every two hours and rotated periodically in a dehydrator that relies upon only a heating element. This allows for more even distribution of heat.
- Once the leaves are crisply dry, the trays can be removed.
Oven Drying
Herb harvest season typically occurs when it is 90+ degrees outside. As such, oven drying is my least preferred method, simply because it heats up my home at a time when I’m trying to cool it down. I have, however, used oven drying on occasion. I find it works best for sage, mint, rosemary, thyme and parsley leaves that have been stripped from their stalks.
Instructions
- Space out leaves on a parchment paper lined baking sheet.
- Place in oven and set to the lowest possible temperature. Higher temperatures diminish the fragrant essential oils.
- Leave the door ajar to allow moisture to escape (this is necessary, and indeed why I hate oven drying . . . “it’s getting hot in here”).
- Turn the leaves over after 30 minutes to ensure even drying; they will be quite dry after about an hour. Leave in the oven until cool.
Microwave Drying
My neighbor taught me how to dry herbs in the microwave. I’ve found it is a wonderful way to dry small quantities of herbs, such as those left-over from cooking.

Instructions
- Place a single layer of leaves, striped from the stem, on a microwave-safe plate lined with a paper towel.
- Lay another paper towel on top, and microwave on high for 1 minute. Watch closely, and stop if you smell the herbs burning.
- Continue heating at 15 second intervals, if needed, until the herbs are fully dry.
Storing and Using
Note: This process works for all drying methods.

Leaf Removal
Ah yes, the dreaded leaf removal. You go to remove your dried thyme leaves from the stem and it’s twig city. My sister recently asked me how I remove the small dried leaves from the stem without the twigs breaking off every which way. Here’s how.
Instructions
(I came across this method at a Fresno Greek festival demonstration last year, and it works wonders!)
- Place the dried herb stems inside a clean pillow case.
- Gently shake.
- Voila! The herb leaves are magically separated from the stems. I think the softness and texture of the pillow case helps gently pulls off the leaves. You might have a few twigs break off, but it is far quicker and easier than trying to remove the leaves with your hand.
Storing
Leaves will retain their freshness when stored whole in an airtight glass jar. I like to use mason jars and re-purpose glass store bought spice containers. Place the container out of direct sunlight and away from heat and humidity. Don’t forget to label the contents and add the date, too.
Using
Dried herbs should be used within one year for maximum flavor. Remember when cooking, use less dried herbs than you would fresh because they are more concentrated.

Hope you have as much fun drying your herbs as I do! Enjoy!


Great post
LikeLiked by 1 person
Just bought a used Excalibur dehydrator for $75! Can’t wait to dry herbs. So far I’ve made “watermelon jerky” and yogurt.
LikeLiked by 1 person
Reblogged this on Swamp Yankee Style and commented:
Wonderful Tutorial on drying your herbs.
LikeLiked by 1 person
Dear Yankee,
You are able to grow thyme from year to year? Outside? We live in similar areas (I think?) How do you do that? I would LOVE to have thyme in my garden! Do you provide some sort of protection from the winter?
Elizabeth
LikeLike
Yes! I am able to grow oregano, thyme, and sage year to year outdoors. I live in central California, growing zone 9, and we typically have HOT summers and COLD (freezing but no snow) winters. I’ve had a steady harvest from the same herb plants for 3 years now. Even with frost, the stems of the herbs closest to the ground are green through the winter. I’ve heard some people say that thyme, in particular, can even handle snow without coverage. I think the only caveat is the plants need to be well established (planted in the spring) before handling the cold. Hope this is helpful! 🙂
LikeLike
Great info! And I have that same electric dehydrator. 🙂 Ronco!
LikeLiked by 1 person
Pingback: How-to Dry Herbs | GrannyMoon's Morning Feast
Pingback: How-to Prune & Propagate Basil – Never Enough Thyme
This is so very helpful. Thanks. 🙂
LikeLike